Purpose
|
|
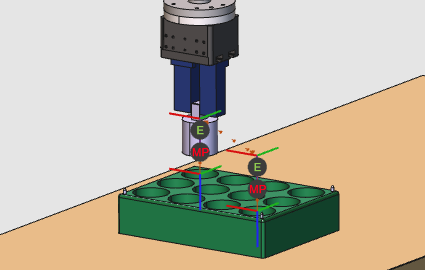
After setting up the workcell with the part, a base program to pick and place that part will be generated.
|
|

|
The basic steps are made to generate the toolpath for the pick and place operation. Then the result will be simulated.
|
|
|
Steps
|
|

|
Be sure to save your changes frequently.
|
|
|
1
|
Preparation
|
1.1
|

|
Switch to the Offline Programming workbench.

|
|
|
2
|
Setup the project
|
2.1
|

|
Add the workpiece and the workpiece box to the project.
|
|
2.2
|

|
Select the Drag & Snap mode to place the cylinder in the box.
|
|
2.3
|

|
The box has three centering pins for calibration. The position of the box on the table has been measured with the robot. The result coordinates have been written in an external file.
Load this file, located in the installation drive of this manual, in order to calibrate the box on the table. Then switch again to Drag & Snap mode to place the box onto the table.
|
|
2.4
|

|
Check or set the technology and its attributes.
|
|
|
|
|
3.1
|

|
Create the first operation, where to grab the workpiece.
|
|
3.2
|

|
Simulate the operation. Then add an event at the lowest position of the operation to grab the workpiece.
|
|
3.3
|

|
Create the second operation, where to release the workpiece.
|
|
3.4
|

|
Add an event at the lowest position of the second operation to release the workpiece. Then simulate the final result.
|
|
|
|
|
4.1
|

|
Generate the program to be uploaded to the robot controller.
|
|
|
|
|
5.1
|

|
Save the project under an appropriate name.
|
|
|
|