|
Wibu CodeMeter installation
|
|
After the Wibu CodeMeter Runtime software has been downloaded it can be installed. A plain default installation here is sufficient.
|
|
Just make sure that the marked components Network Server and Remote access to Webadmin are included in the installation.
|
|

|
|
A guide to assist the installation can be downloaded from the Wibu website.
|
|
|
|
|
After having successfully installed the software, the icon of the CodeMeter Control Center will appear at the lower right corner of your windows taskbar on your main screen.
|
|

|
|
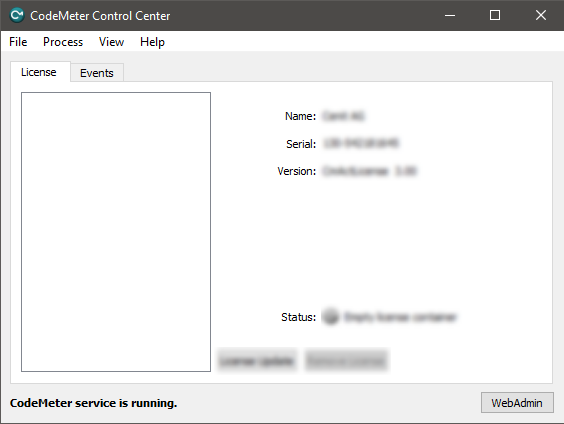
The Control Center can be started from here or through the Windows Start menu. It opens with a panel similar to the picture below.
|
|
|
|
|
License preparation
|
|

|
When you have received a license dongle, plug the dongle into the USB port of the workstation. It will be pre-configured instantly and ready for use.
The following steps in this paragraph can be skipt and please continue with the License request and activation.
|
|
CodeMeter uses so called containers; packages of licensed (vendor) products. The FASTSUITE container Cenit_AG.WibuCmLif has to be downloaded from the Cenit download portal if it has not been received by email.
|
|
|
|
|
With the container file downloaded, the license preparation can be started.
|
|
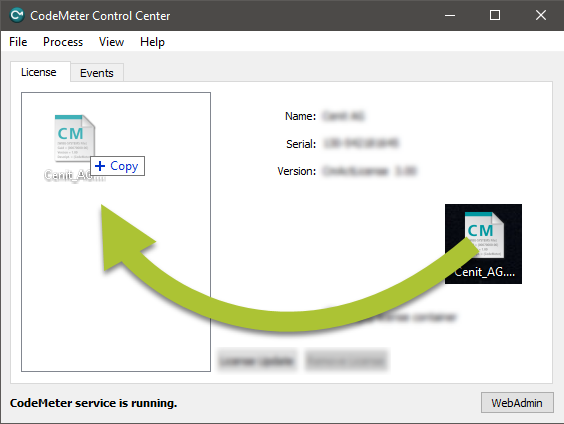
Pick the file from the download location and drag it into the CodeMeter Control Center. Then drop it in the empty container area.
|
|
|
|
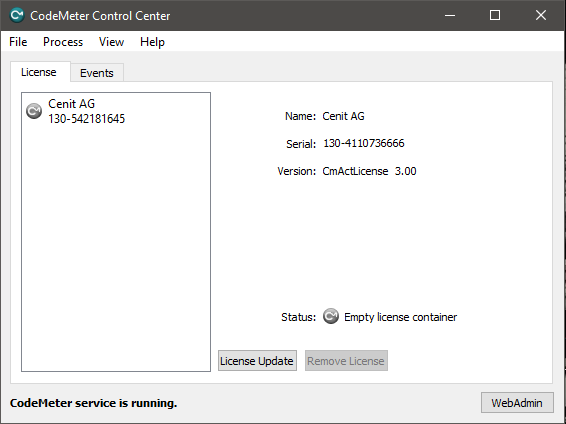
The container will be imported. When successful, the result should look similar to the picture below.
|
|
|
|
|
|
License request and activation
|
|
With the container generated, the license installation can be started. Go to the FASTSUITE webdepot.
|
|
|
|
|
This will open the login page.
|
|

|
|
Enter the ticket number you have received by email and press the Next button to continue. A list appears of all licenses that are included in this ticket, like in the example below.
|
|

|
|
Press the Activate licenses button to continue.
|
|
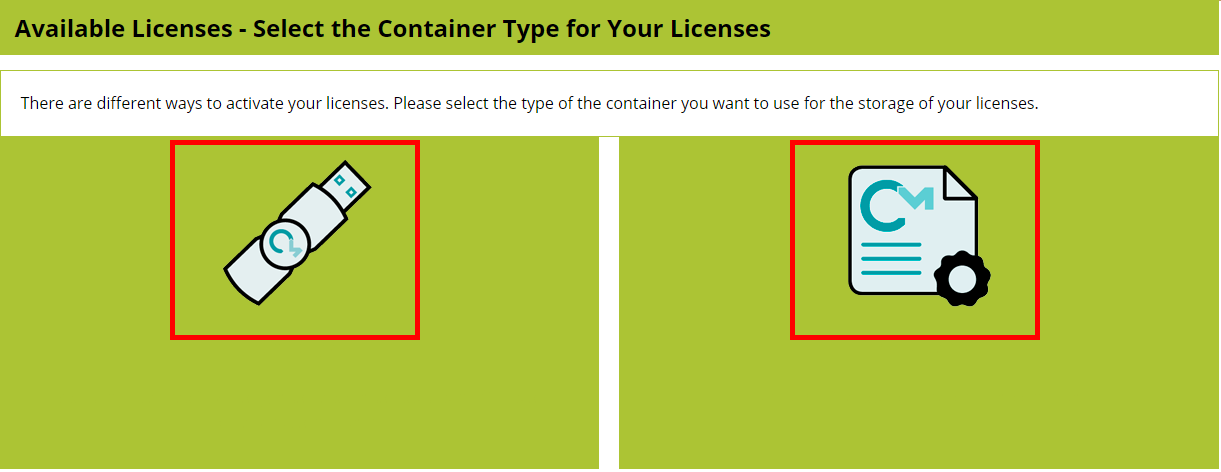
On the next page the selection has to be made if the license has to be installed on the dongle, which can be used on any workstation, or if you want to receive a license file, that will be installed on a dedicated workstation.
|
|
|
|
Press on the button, corresponding to the license type you require. The following steps then are the same for both types.
|
|
A) Online installation
|
|
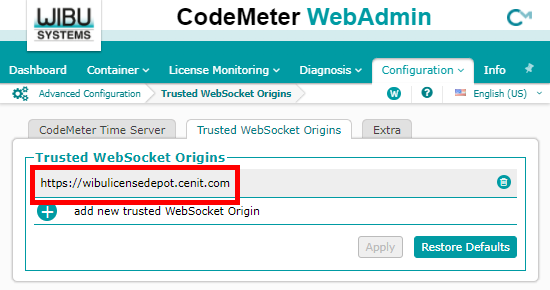
With the online installation, the default method of the webdepot, the license will be installed and activated automatically. To enable the online installation it needs to be verified that the webdepot is listed a Trusted Websocket Origin in the CodeMeter Webadmin.
|
|
In the CodeMeter Control Center press the WebAdmin button. It opens the administration in your default browser.
|
|

|
|
Go to the menu Configuration - Advanced - Trusted WebSocket Origins.
|
|
|
|

|
Check if the address https://wibulicensedepot.cenit.com is in the list of Trusted WebSocket Origins.
When the link to the webdepot is not listed here, you need to add it, otherwise the online activation is not possible.
|
|
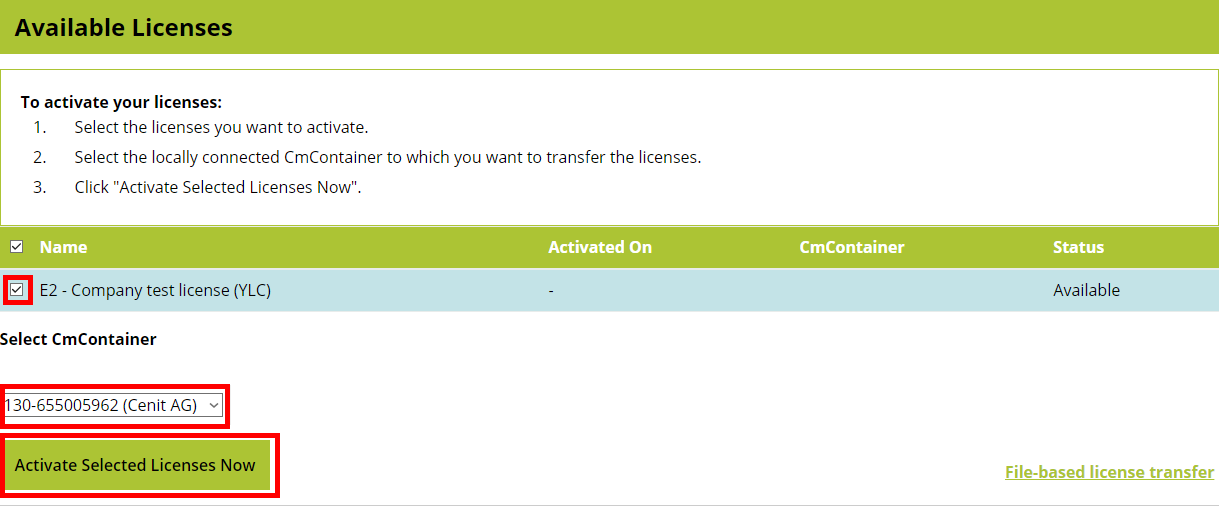
The webdepot returns with an overview of available licenses. Then simply follow the instructions on the page.
|
|
|
|
B) File based license transfer
|
|
With this method you will receive the license file by file transfer. It takes a few manual steps to request, receive and activate the license.
|
|
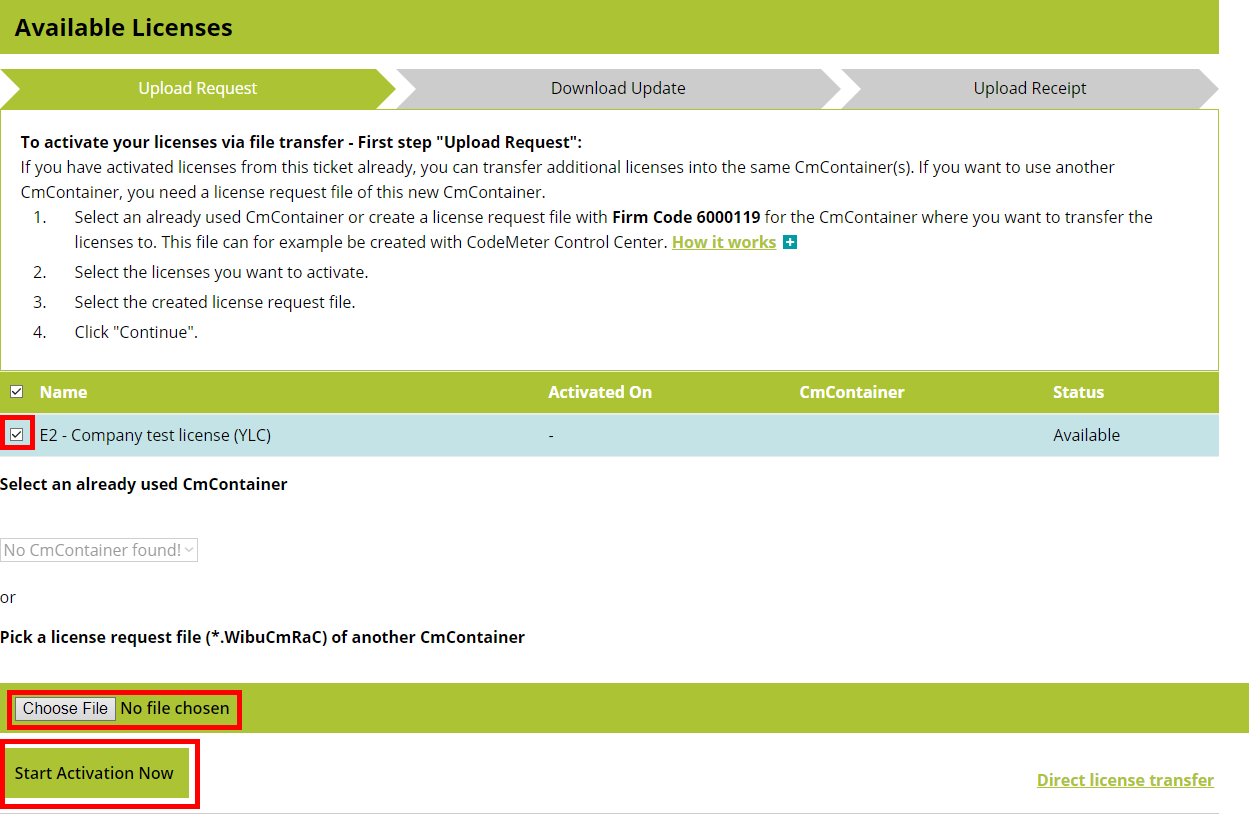
The page changes with the instructions how to proceed.
|
|
|
|
In the Upload Request, follow the instructions to either extend an existing license file or to generate the license request file for a new container, i.e. license file. When completed, then press the Start Activation Now button.
|
|
After the request has been uploaded successfully, the Download Update tab is opened. The license file can now be downloaded.
|
|

|
|
Import the license file in the corresponding container as explained in the instruction on this tab. Then press the Next button.
|
|
|
|
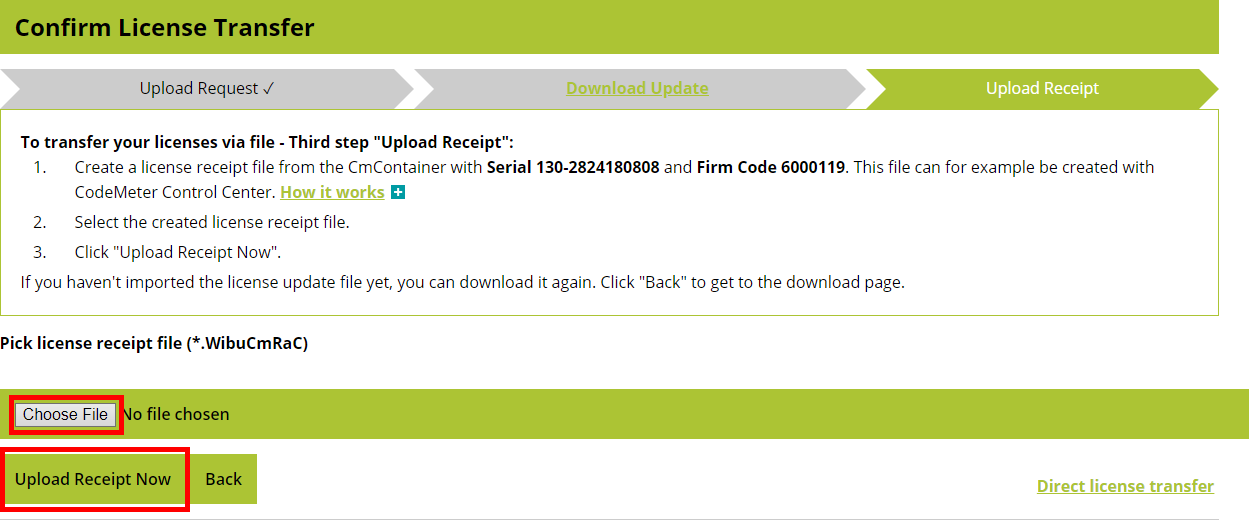
The final step is to confirm a successful license activation in the Upload Receipt tab. Simply follow the instructions to generate the receipt file and upload it here.
|
|
A confirmation appears.
|
|

|
|
License overview
|
|
The license overview has been updated after the available license has been activated.
|
|

|
|
|
|

|
To update a license or to renew it, the same procedure has to be followed.
|
|
|
|
Configure the license server
|
|
In the CodeMeter Control Center press the WebAdmin button. It opens the administration in your default browser.
|
|

|
|
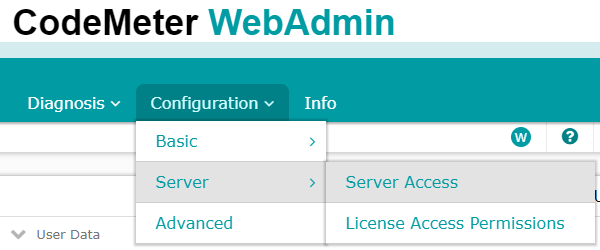
Go to the menu Configuration - Server - Server Access.
|
|
|
|
Enable the network server and press the Apply button to confirm it.
|
|

|
|
The server is now ready to distribute the license package.
|
|
|
Configure the license client
|
|
On each client open the CodeMeter Control Center and press the WebAdmin button. It opens the administration in your default browser.
|
|
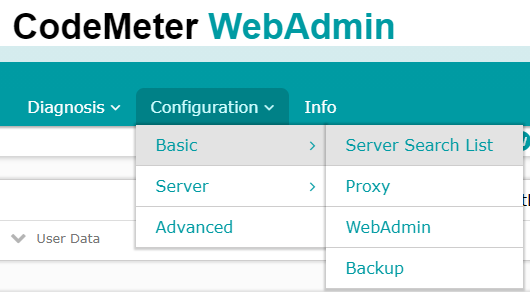
Go to the menu Configuration - Basic - Server Search List.
|
|
|
|
Add the license server name and confirm it.
|
|

|
|
At the bottom left side of the WebAdmin usually the localhost is shown as the current server. The defined server name should appear in the list of servers when you click on it..
|
|

|
|
The client is now ready to request a license from the server.
|
|