Purpose
|
|
Learn to apply the box welding strategy to run inside corners without collision.
|
|

|
Load the project Arcwelding_Basic.cenprj from the Projects folder of this tutorial library.
|
|
|
|
Steps
|
|
1
|
Program a welding operation
|
|
1.1
|

|
Change to Generate process geometry. When needed, un-check the Box welding analysis option. Then program the seam operation.

|
1.2
|

|
Activate the collision analysis in the simulation toolbar and run the simulation. Notice that in the corner of the welding part the welding torch collides with the workpiece.

|
|
|
|
|
2.1
|

|
Create a new program. Then check the Box welding analysis option and program another seam operation in the welding part corner. Notice that the welding path, the number of positions in the corner, looks different than in the previous welding seam. Open the Active program dashboard and run a simulation on the new operation group to see that the motion should be collision free.

|
2.2
|

|
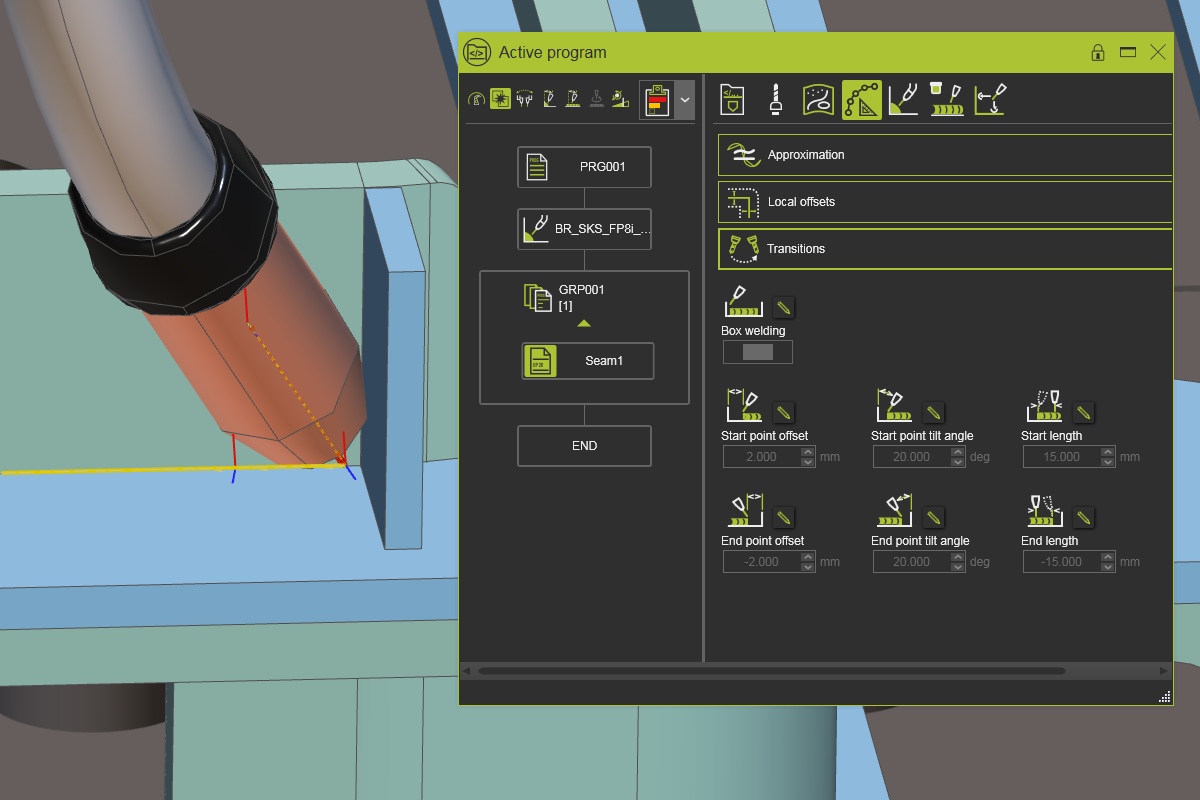
In the Active program dashboard, select the Toolpath calculation tab and open the Transitions container. Change the value for the Start point offset. This defines the offset to move the real start or end position away from the manufacturing geometry limits.

|
2.3
|

|
Change the value for the Tilt angle. This defines the angle the tool will have when entering the corner.

|
2.4
|

|
Change the value for the Start length. This defines the distance from the transition point to the beginning of the manufacturing geometry.

|
|
|