Purpose
|
|
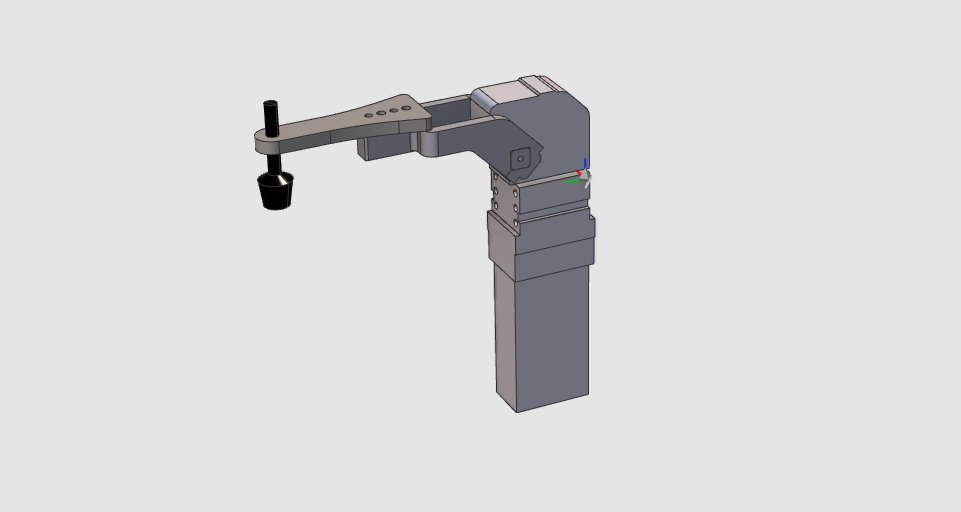
The fixture clamp will be created from an external file containing its geometry.
|
|
|
The geometry of the clamp will be imported from an external file to build the clamp resource. To be able to simulate the clamp motion, the resource will be extended with the kinematic chain and further information needed.
|
|
|
|
Steps
|
|
1
|
Preparation
|
1.1
|

|
Switch to the Resource Builder workbench.

|
|
1.2
|

|
Create a new, empty document.
If another document is already open in the running session, this step has to be executed. If not, this step can be skipped.
|
|
1
|
Click on the File command in the upper document toolbar. A drop down menu opens.
|
 
|
|
2
|
Click on the New command.
|
|
|
3
|
If a document is already open, a message appears to decide to save that document, close it without saving or to cancel the execution of the New command.
|

|
|
|
|
|
|
2
|
Define the clamp properties
|
|
2.1
|

|
Import the geometry from the file Clamp.stp, which is located on the installation drive of this manual.
|
|
2.2
|

|
Create a new fixture type resource for the clamp.
|
|
2.3
|

|
Give the fixture an appropriate name.
|
|
|
3
|
Build the clamp shape
|
3.1
|
|
Build the kinematic skeleton of the clamp. With this skeleton the clamp can move during simulation.
|
|
3.2
|

|
Attach the clamp geometry to the skeleton.
|
|
|
4
|
Complete the clamp resource
|
4.1
|
|
Give the rotational joint of the clamp an appropriate name and set its kinematic limits.

|
|
4.2
|

|
Define the home position(s) of the clamp.
|
|
4.3
|
|
Update the home position(s) of the clamp.
|
|
4.4
|

|
Define the simulation behavior of the clamp.
|
|
|
5
|
Save
|
5.1
|

|
Save the completed clamp resource.
|
|
|
6
|
Duplicate
|
6.1
|
|
Create 3 copies of the clamp. For each copy, the name of the clamp and its kinematics has to be changed. Then save that clamp as a new resource.
|
|
|
|

|
Be sure to save your data frequently.
|
|
|