Purpose
|
|
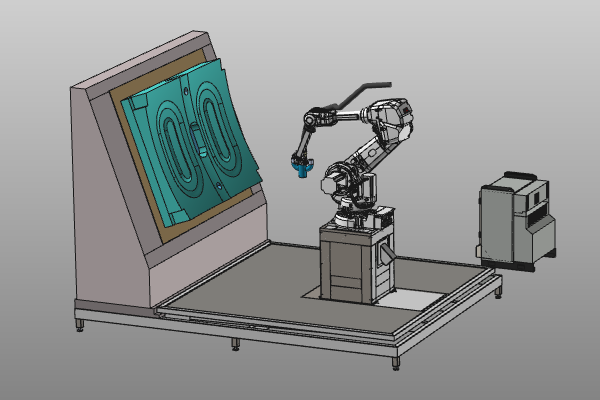
Setting up the water jet cleaning project means building the shopfloor manufacturing environment with the robot and all other necessary equipment. The workpiece is loaded to complete the project.
|
|

|
The layout will be built from some standard equipment, like the robot. All components will be positioned and connected together to configure the shopfloor layout. And finally the workpiece will be loaded into the workcell.
|
|
|
|
Steps
|
|
1
|
Preparation (if needed)
|
|
Depending on the license package that is used:
|
1.1
|

|
Switch to the Layout Builder workbench.

|
Or

|
Switch to the Offline Programming workbench.

|
|
1.2
|

|
Create a new, empty document.
|
|
1
|
Click on the File command in the upper document toolbar. A drop down menu opens.
|
 
|
|
2
|
Click on the New command.
|
 
|
|
3
|
If a document is already open, a message appears to decide to save that document, close it without saving or to cancel the execution of the New command.
|

|
|
|
|
|
|
|
|
|
2.1
|

|
While switching to any workbench, the Operation mode Normal is set active automatically. When working in the Offline Programming workbench, one has to switch to the Operation mode Drag & snap to be able to move the individual components in the fixture assembly.
|
2.2
|

|
Open the project structure and add the floor, the robot and the controller, that are located on the installation drive of this manual, to the layout.
|
|
2.3
|

|
Add the previously built cleaning device to the layout.
|
|
2.4
|

|
Place the components onto their position with drag and drop, while connecting the adapters.
|
|
2.5
|

|
Build the electrical connection between the controller and the robot.
|
|
|
|
2.7
|

|
Save the layout. The layout document only contains the shopfloor equipment of resources and controllers.
|
|
|
3
|
Build the shopfloor project
|
|
3.1
|

|
Open a new document in order to start a new project.
|
|
3.2
|

|
Add the previously saved layout and the earlier built workpiece to the project. Place the workpiece on the carrier.
|
|
3.3
|

|
Verify the layout structure of files being used. Possibly marked in red indicate unsaved items.
|
|
|
4
|
Prepare for collision analysis
|
|
Steps to prepare the workcell to run a collision analysis during simulation.
|
4.1
|

|
Switch to the Offline Programming workbench.

|
|
4.2
|

|
Define the collision groups. One group for the equipment and a second group for the workpiece.
|
|
4.3
|

|
Define the collision analysis in the simulation settings, i.e. which groups are to be analyzed against each other.
|
|
|
|
|
5.1
|

|
Save the setup as a project (.cenprj) under an appropriate name.
|
|
|
|